When You Mix CBD with Alcohol
Curious about the outcome of CBD and alcohol mixed? Mixing CBD with alcohol has been done by several people now. But, the question is, is it safe? Is it desirable? What effects does it cause? Is it worth it?
Well, we will be answering all of these questions one by one. It seems like people are mixing CBD with almost everything after the stories of its benefits circulated. CBD is a natural relaxant with no THC content. So, it will not get you high. There are several forms in which CBD is sold, in the market, for example, vape oils, best CBD night capsules for sleep, body cream, gummies, candies, lip balms, protein bars, bath soaks, and many more. And, now it is also being introduced in alcohol.
What is CBD?
CBD or cannabidiol is a natural compound found in the plants of Cannabis sativa. It is a natural relaxant that is a non-psychoactive compound. CBD has been used and abused largely. It is distinguisher due to its medical benefits and banned in several states due to several reasons.
What makes CBD desirable is its non-psychoactive effect. Unlike THC, CBD will not induce a high feeling. It makes CBD suitable for medicinal purposes. It is widely use as antidepressants, treating insomnia, skincare products, and other critical health care purposes. CBN and CBD oil for sleep is mixed with different oils. It is known for its positive results in treating chronic pain.
Mixing CBD and alcohol
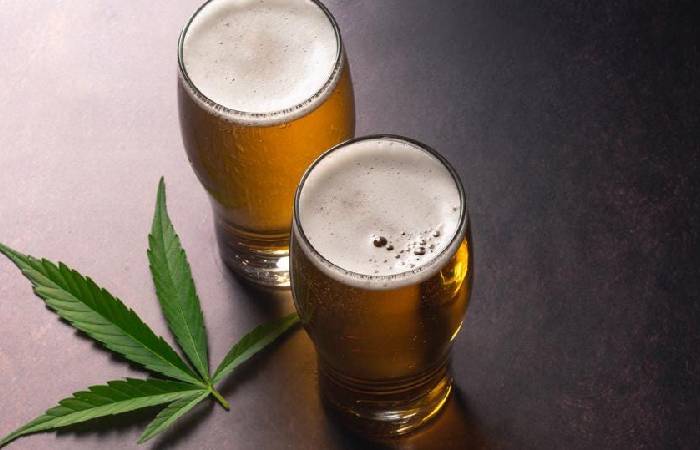
Let us understand some simple facts about alcohol. It would help you understand the effect of CBD when it is mixed with alcohol. Alcohol too known for its relaxing effects. It produces a calming effect by reducing anxiety and stress. In other words, you can say that the activity of alcohol is somewhat similar to that of CBD.
1. Complimentary
When CBD and alcohol are mix, they complement each other. For example, it has been observe in research that people taking CBD experience better sleep. In addition, mixing CBD with alcohol can be effective for those who experience comparatively higher anxiety and sleepiness.
Suppose you are somebody who has been using CBD for some time. But, failing to receive desirable results then, this mixture can help you get that. A person suffering from prolonged sleepiness can also try CBD capsules for sleep.
The amplified performance of CBD with alcohol has been prove in several studies. But, make sure to talk to a doctor before making any change in your consumption.
2. Saves from side effects of alcohol
Several studies support the statement. Though the number of studies is not enough to back this statement strongly. But, the studies do suggest that CBD has some role in suppressing the side effects of alcohol.
Let us talk about it in details:
- Prevents from potential cell damage
This way or the other, we all have come along with the undesirable effects of alcohol consumption on the human body. One such issue caused by alcohol is cell damage. Alcohol can catalyze the development of carcinogens in the body. In addition, it often leads to inflammation of cells causing damage to the pancreas and liver.
CBD has shown promising results in arresting the body from cell damage alcohol can cause.
These tests have been perform on mice, and we saw positive results. The introduction of CBD in their body inhibited the side effects of alcohol. It also promoted cell growth.
Enough studies are yet require to prove if the same works on the human body.
- Lowers blood alcohol level
The blood alcohol level is the amount of alcohol present in 1L of your blood. If the blood alcohol level of 1L blood reaches the mark of 0.1%, it is consider high. A level above 0.45% is, however, fatal.
High blood alcohol level decreases the ability of judgment and sometimes results in impairment.
A study on ten people showed that taking 200 mg of CBD along with alcohol decreased their BAL. And later, it dropped down to a safer mark.
Whereas several tests conducted with various animals produced contradicting results. Hence, more tests and studies are need to bring clarity to the subject.
Several studies have shown that CBD can effectively treat addiction to alcohol. For example, tests have been conduct on rats with alcohol addiction. Studies found that the introduction of CBD in their body minimized relapses and decreased the desire to consume alcohol.
More tests are require on humans to establish it.
A test on 24 smokers has also conducted. The smoke was replaced by CBD, which curbed the usage of cigarette smoke to 40%. So, this test does support that CBD helps treat addiction. But, the fact is yet to be pillared.
Is it worth it?
We have discussed several studies and tests conducted on humans and animals. These tests point towards the positive results of CBD on alcohol addiction. But, the tests are not enough to strongly support the statement. We do need more promising research on the topic to
However, these limited studies provide room for good results that we could draw out of the mixture. But, the question is, is it worth? Should we go for this mixture? Let us try to answer this question.
You should note that sensitivity towards CBD is different for different people. Not every human needs to react the same way to CBD. However, enough results are not available to say CBD helps with addiction. It cannot be suggest to take CBD and alcohol together without any legit information available.
So, if you plan to consume a mixture of CBD and alcohol, start with small doses. And record the changes. You can also consider consulting your doctor before doing so.
Final thoughts
The mixture of CBD and alcohol amplify each other’s effects but, the effectiveness is still a matter of concern. If possible, it is better to avoid consuming CBD and alcohol together.
Several studies do partially suggest the effectiveness of the mixture. But these results are derive only by administration of a high dosage of CBD with alcohol. The effect of moderate consumption of CBD is yet to be record.